What kind of fragrance air refreshener do you choose?
There are a variety of refresheners sold to the public, the smells too strong to accept for being in my bedroom. :-/
That such strong and strange fragrance just makes me feel I’m in the toilet lol
That’s why I’d like to make certain aroma refrshener myself.
Well, my sister used to putting a scented bag of Snuggle in the closet intrigues me a lot to make this DIY one to show you.
Let’s check it out!!!
***The materials we need is as below:
UBS fan, cleaned carton-pack beverage, scented bag, box cutter, take-it, power bank
Step1. Tear the opening of carton open, and cut some holes on the bottom to make air circulation
Step2 . Stick the take-it onto the carton to fix the USB fan
Step3. Put the scented bag into the carton, and put the USB fan at the opening of it
※ Remember to make the air vent of fan toward the bottom of carton!!!!!!
Step4. Plug the USB cabin into the port of power bank to start the fan, and it’s done!

Actually, I prefer putting the scented bag everywhere I need;
It would be too much fragrance to be dizzy! :@
For example, to make the musty coat refreshed or to ease the food smell from the clothes.
This such fan refreshener spread the fragrance much widely, effectively, and fast.
It is pretty convenient to put it in the closet.
Non-occupied and mobile!!!
But first, wash the carton clean lest it may welcome ants :p
You can place it anywhere you want, besides in the closet and the bedroom.

By the way, I wonder if there is another kind of fragrance material to be used.
Is there any better advice about the aroma material?
Don’t hesitate to make some comments below :-)
Hope you like the idea for DIY I share with you guys.
Let’s do it right now! <3<3
Does the same problem bother you?
Does it take so long to dry your brushes for cosmetics?
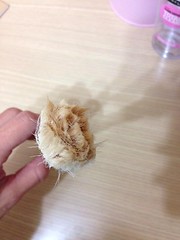
Girls know that it’s the routine to clean your brushes once a week to keep your face away from allergy.
However, it’s not that easy to dry brushes in a cold winter.
It always takes almost over a day to kill my patience.
And you know it, all the brushes need to be air-dried naturally!
You cannot use a blower with hot air or put it under the big sun to dry it out.
If you dry it out by heat, you have to buy a new one then lol
It’s dried quickly after washing it in a summer almost within 1 day.
But it takes over 1 day in winter.
Therefore, I came up with an idea to solve such an annoying problem.
Let me share my DIY for drying brushes with you girls!
Quickly and effectively drying the brushes!
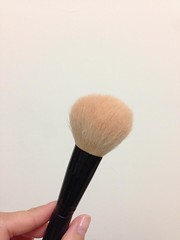
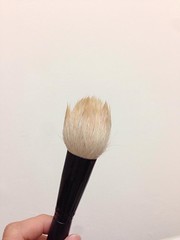
↑eww, dirty powder brush
Let’s do it!!!
What should we prepare for it?
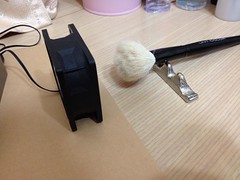
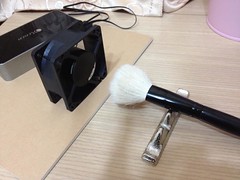
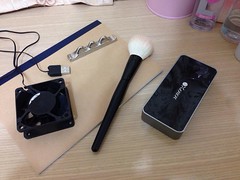 →USB fan, power bank, powder brush, paperweight, notebook(to keep the fan stable)
Step 1 . Lightly tap the wet brush to cast off extra water
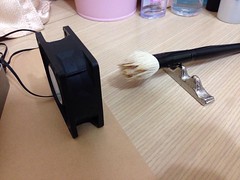
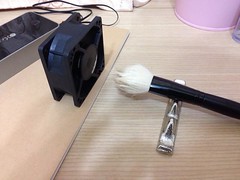
Step 2. Connect USB port to power bank to start the fan; put a notebook under the fan to keep it stable while vibrating
Step 3. And the last one! Put your brush onto the paperweight (picture as below)
Isn’t it pretty convenient huh?
a USB fan, a brush
and only getting power to put all the stuffs on the dressing table
Magically, it just took me almost two hours and half to dry my powder brush!
You girls should try this way!!!
Look!
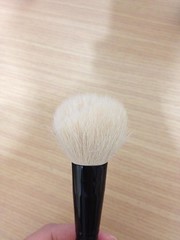
The hair of brush is still fluffy!
This useful DIY method totally solves my problem about drying brushes in winter days.
As long as you turn on the fan to blow the brush,
you will get a brush like a brand new one :D
AFTER
※ Comparison between BEFORE and AFTER
The fluffy head of brush is still perfect!
Hope you girls like my DIY, sharing with you! :)